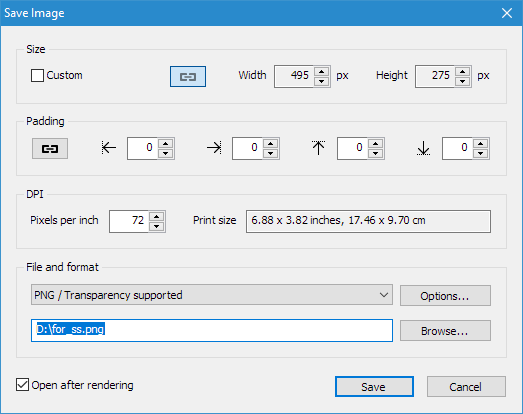
Saving image
- Select the Save Image... item on the File menu or
click on the Save Image... button on the toolbar. To save text
image with the keyboard, simply press F5 on your keyboard and follow
these instructions.
- Set the image dimensions.
To set custom image size, select the Custom option in the Size
group.
For the custom size option: click on the Width box and enter the
image width in pixels, then click on the Height box and enter
the image height in pixels. To preserve the image proportion, check
the box by the Keep proportion option.
- In the Padding group, click on the padding boxes and
enter the desired left, right, top, bottom padding values in pixels.
- You can set the Pixels per Inch value for PNG and JPEG formats. In this case, you will see the size of the
resulting image in inches and centimeters in the Print Size field.
- In the File and format group, select the image format and then
click on the file box and enter the image name with the full path or
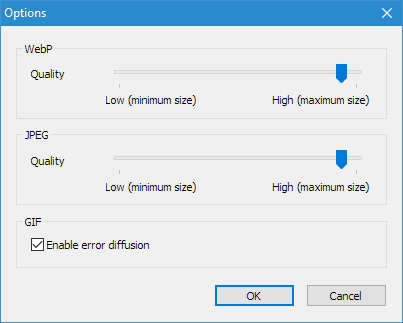
click on the Browse... button and select the image. Click Options for more format options.
- Check the Open image in default app option if after saving you want to open the file in the default viewer.
- Click Save to complete or click Cancel to cancel and return to the program.
Related topics
3D Text Commander