Saving image
Select the Save Image... item on the File menu or
click on the Save Image... button on the toolbar. To save cover
image with the keyboard, simply press F5 on your keyboard and follow
these instructions.
-
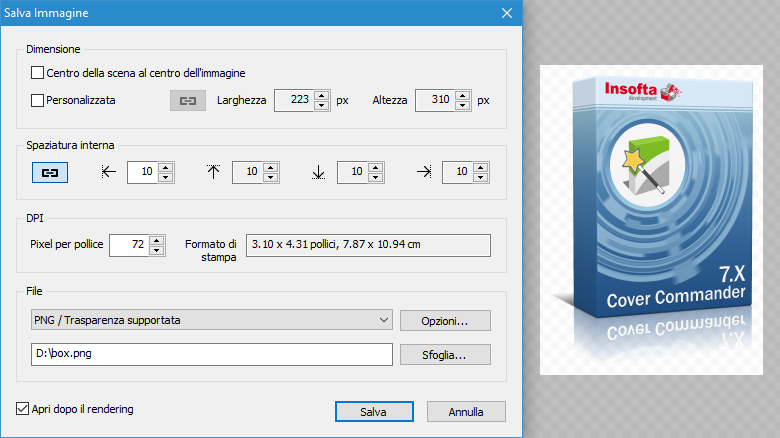
By default, the image you see in the preview panel is saved. Its current dimensions are displayed in the Width and Height fields.
The frame shows the part of the image that will be saved (including padding).
If you enable the Center the scene in the center of the image option, the scene will be centered regardless of the location of objects and their shadows. Otherwise, all empty fields will be cut off (except for those indicated below in the Padding group).
If you want to get other sizes with pixel accuracy, turn on the Custom option and set the required width and height. In this case, the preview frame shows the relative dimensions of the image, which will be scaled to your size.
If the Keep proportions button is active, then you must set only one size (width or height), the second will be calculated automatically.
- In the Padding group, click on the input boxes and
enter the desired left, top, down, right padding values in pixels.
The value of this fields can be negative. In this case, the image will be cropped.
Please note that if you specify custom sizes, they will include padding.
If you enable the Make equal option, then you only need to specify the value on the left, the rest will be equal to it.
- You can set the Pixels per Inch value for PNG and JPG formats. In this case, you will see the size of the
resulting image in inches and centimeters in the Print Size field.
- In the File and format group, select the image format (PNG, JPEG, GIF and other) and then
click on the file box and enter the image name with the full path or
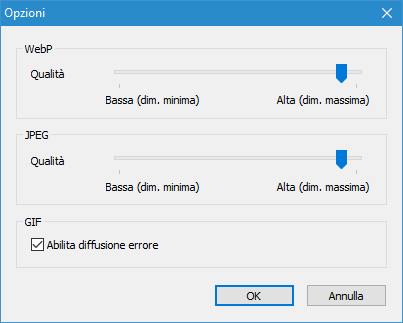
click on the Browse... button and select the image. Click Options for more format options.
Please note that not all formats support transparent backgrounds.
- Check the Open after rendering option if after saving you want to open the file in the internal viewer.
- Click Save to complete or click Cancel to cancel and return to the program.
Related topics
Cover Commander