Creating new project
- Select the New Project... item on the File menu or click on the New Project... button on the toolbar. To create a new project using the keyboard, simply press the Ctrl+N keys on your keyboard. This will open the New Project Wizard, which will guide you through the project creation process.
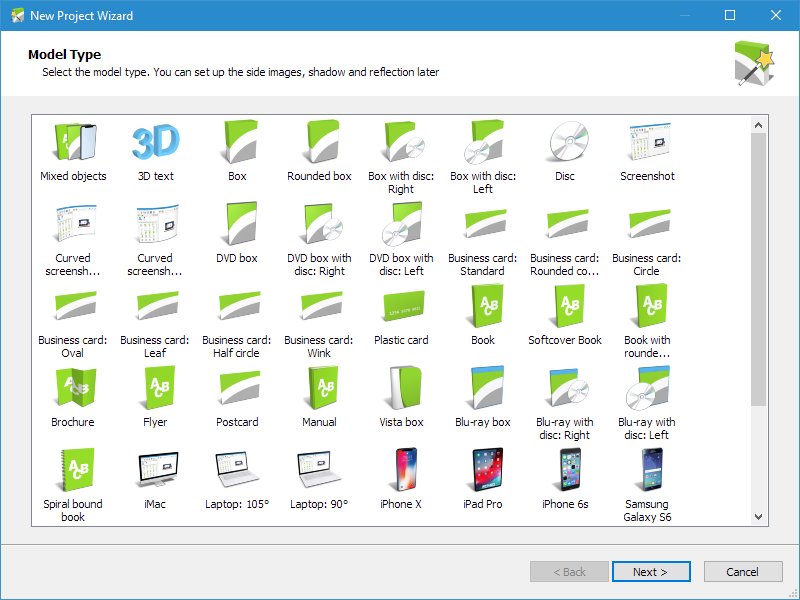
- In the New Project Wizard window that appears, select the model type by clicking on an icon on the list and then click Next. You can set other images and effects later.
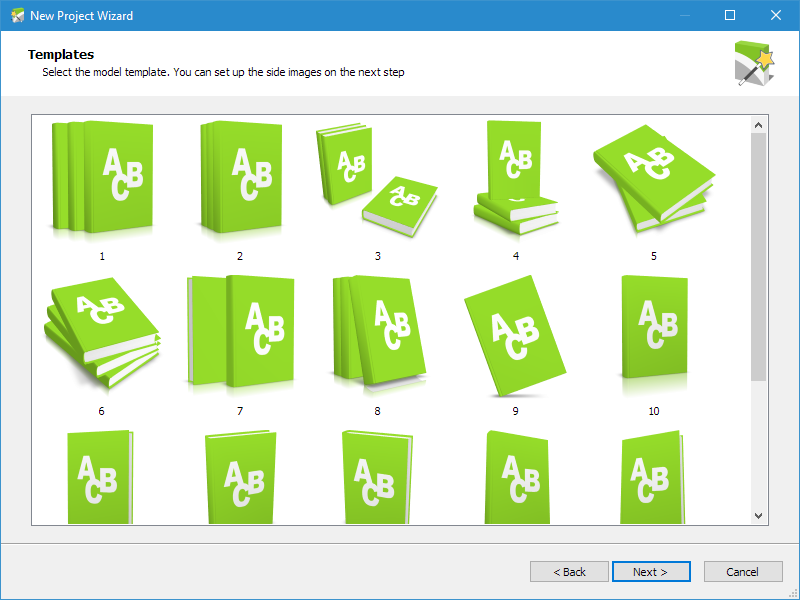
- Select the model template by clicking on an icon on the list and then click Next.
- Select side images by clicking on the Browse... button by each image and then selecting the image file in the Open window that appears. To clear a wrongfully set image, simply click on the Clear button by the image to be cleared.

- Set shadow and reflection parameters. To enable showing shadow, select Show shadow; to disable showing shadow, select Don't show shadow in the Enable shadow group. To enable showing reflection, select Show reflection; to disable showing reflection, select Don't show reflection in the Enable reflection group. Click Finish to complete the new project setup.

Clicking Finish will create the project and open its properties on the left and display the cover preview in the Cover Preview frame on the right of the main window. Read more on adjusting project properties in Customizing project. For details on project saving options, please read Saving project.
 If you had another project open in
the Cover Commander before starting the new project, the program will
prompt you whether the active project is to be saved or discarded.
If you had another project open in
the Cover Commander before starting the new project, the program will
prompt you whether the active project is to be saved or discarded.
You can adjust the project parameters later by opening the corresponding tab in the program's main window and then altering the options to be adjusted.
Related topics
Cover Commander